Nut sucks to configure. There is hardly any recent, reliable info out there (aside from the inline documentation in the conf files, wealth of information on the official site, and helpfule error output - but who wants to wade through that ;). Plus, a few years ago it was a LOT worse, so count your blessings and use a recent distro, ya whippersnappers.
So let's change that. Here's a guide that's easy to digest and may even work for you!
1. Hardware and driver selection
I'll be setting up a nut server in this one, with my ancient APC Back-UPS 650. No, not the one you get when you
google that - mine is so old, they are now reusing the name for a newer product. But it's heavy as hell (that's a positive for me), I just replaced the battery, nut supports it, and I got it for free.
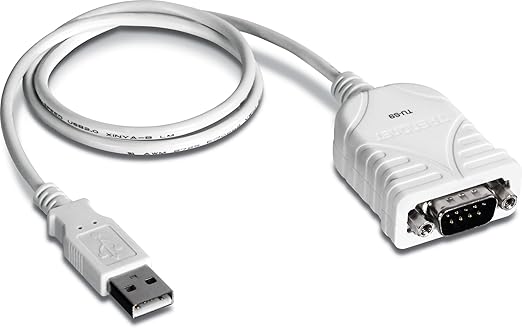
The Back-UPS uses a serial interface, and since the desktop I'm setting up as the server has no serial ports, I'm using a USB-serial converter, available for a few dollars everywhere.
Using a USB-serial converter means you'll be using /dev/ttyUSB[0-9], instead of who knows what for a USB UPS. It's probably at /dev/ttyUSB0, but run this command to find it:
# ls /dev/ttyUSB*
If that comes back with nothing, then you probably hooked up your UPS wrong, (if your UPS is on a real serial port, it will probably be at ttyS[0-9], or maybe ttyO[0-9], or something else weird). If that command comes back with several ttyUSB entries, you'll have to try them all in turn in the section below, or try unplugging and replugging the UPS, checking which dev entry goes away and then comes back.
First, you're going to need to
find your UPS on the nut HCL. The point is to find which driver and arguments are needed to drive your UPS. I'll wait.
Now, if you don't find what's obviously your UPS, don't panic. All may not be lost. My search, for example, returned three UPS variants, none of which were the 650. The differences relate to different cabling configurations, and all use the same "genericups" driver, but with different "upstype" arguments. Since I don't know how my UPS is cabled, I'll just try each of them.
Of course, before we start we also have to install the server package:
# sudo aptitude install nut-server
2. Configure the UPS driver
Open the config file for your UPS hardware:
# sudo vi /etc/nut/ups.conf
Add a section for your UPS - make sure you put it AFTER all the configuration directives:
[mybu650]
driver = genericups
port = /dev/ttyUSB0
upstype = 1
desc = "The beige tractor battery"
The heading is whatever you want to call this UPS. The driver (and, for me, the "upstype" argument) comes from the nut HCL. We found the port in the section above. And the description is also just another place to put some useless text you'll probably never see.
Save the file.
You'll also probably need to add the nut user to the dialout group, so it can access the serial port:
# sudo usermod -aG dialout nut
Now, to test the config, run:
# sudo upsdrvctl start
This will probably fail, because configuring nut is hard. Read the error output, fix stuff, and try again.
Otherwise, if you get no error messages, your driver config is correct!
3. Configure users
Open the users file:
# sudo vi /etc/nut/upsd.users
Add a user and pass:
[admin]
password = something
actions = SET
instcmds = ALL
upsmon master
4. Configure the data server
Open the config file for your UPS daemon:
# sudo vi /etc/nut/upsmon.conf
Add a MONITOR directive:
MONITOR mybu650@localhost 1 admin something master
Start upsd:
# sudo upsd
If you've managed to not mess anything up, you should get no angry messages. If you got some, read them and fix the problem.
Now, check that you're connected:
# sudo upsc mybu650@localhost
This should give you a bunch of output, the most important of which is the ups.status line. Of course, since this is nut we're talking about, the value is cryptic, but basically if it says "OL", that means "online", and everything is good!
5. BONUS: Configure a tray icon
If your nut server is also a desktop, you might want a status icon. This is simple. Install nut-monitor, aka NUT-monitor:
# sudo aptitiude install nut-monitor
You can start it like this:
# NUT-monitor
I have no idea why you have to yell it. If you want to make it autostart in the tray, start it like this:
# NUT-monitor --start-hidden
Careful, it's a bitch to kill like that - Ctrl-C wouldn't do it for some reason.
Add that command to your startup scripts to get nut status all the time. For example, on an openbox system, just:
# vi ~/.config/openbox/autostart
And add:
NUT-monitor --start-hidden &
Boo yah!
(
Go to part 2 to see how to install nut for a Windows 7 client.)